> For the complete documentation index, see [llms.txt](https://help.dscout.com/llms.txt). Markdown versions of documentation pages are available by appending `.md` to page URLs; this page is available as [Markdown](https://help.dscout.com/private-panels/studies/add-panelists-to-a-study.md).
# Add panelists to a Private Panels study
This guide outlines the requirements and steps to add panelists to a **Private Panels** study. To invite panelists to a **Dscout** study instead, see [Invite panelists to a Dscout study](/private-panels/integrations/private-panels-integrations/invite-panelists-to-a-dscout-study.md).
The pre-requisite is that there must be existing panelists added in your company's pool. If there's none yet, you can read our [Create, upload, and manage panelists](/private-panels/panel-management/create-upload-and-manage-panelists.md) guide to know how.
But if there are already existing panelists, continue with the steps below:
{% stepper %}
{% step %}
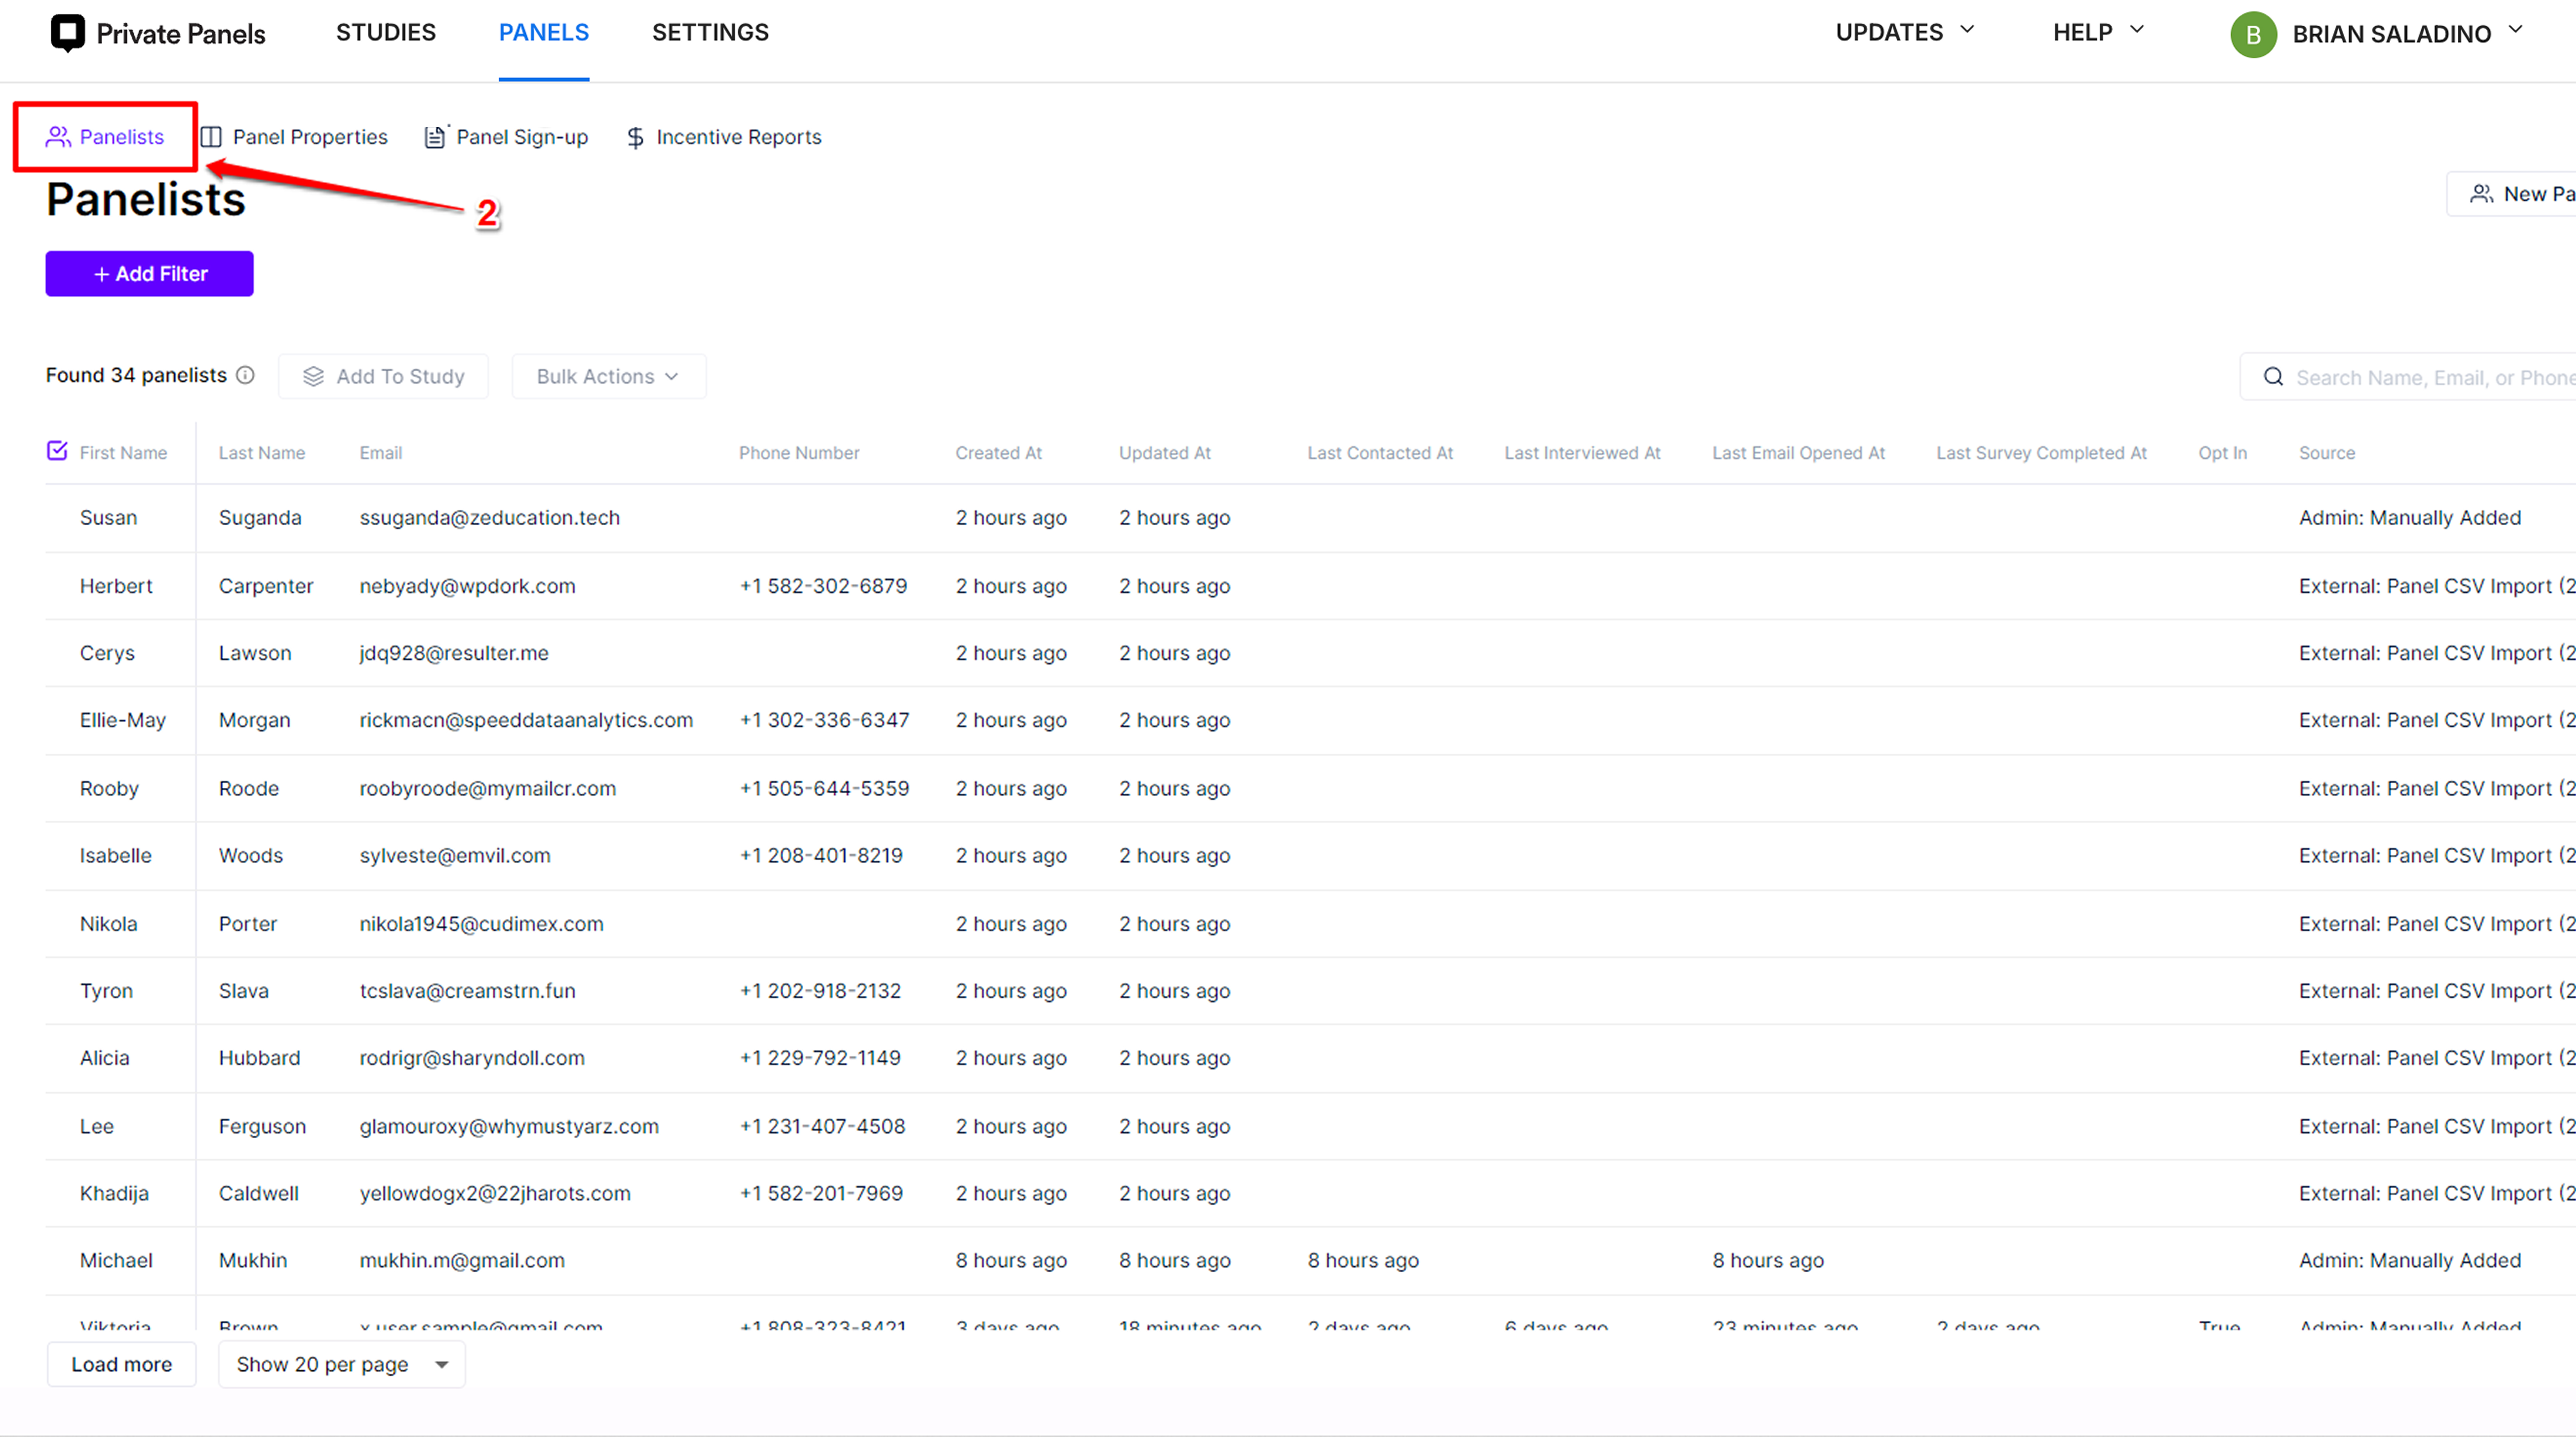
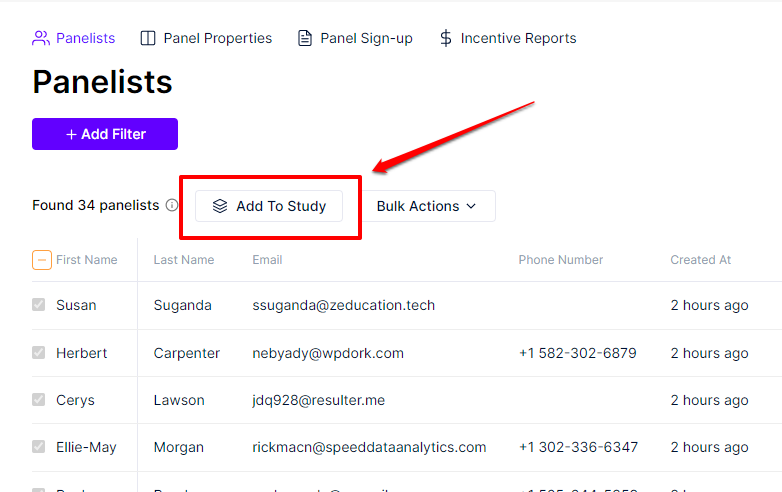
Navigate to the **Panel** page. Its **Panelists** page will open by default. All of your company's existing panelists will show up here in a table format.